

Capital Smart City 5 Marla House Construction step by step
Why Build a 5 Marla House in Capital Smart City?
Select the Right 5 Marla Plot
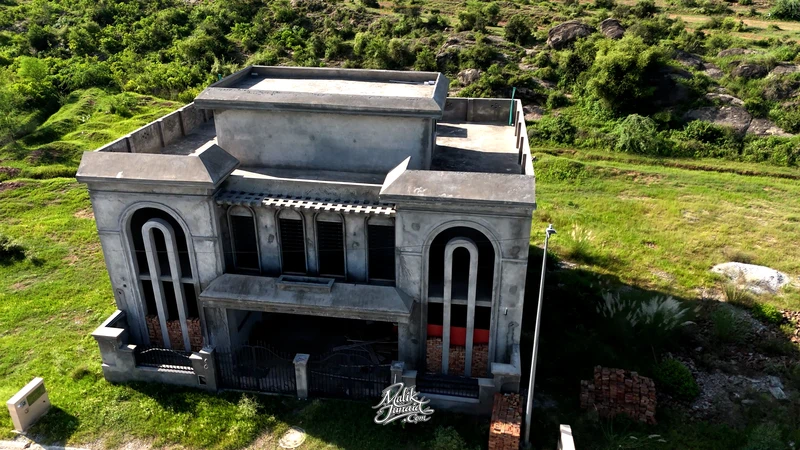
5 Marla House Construction in Capital Smart City Sector H
Today, we are visiting Sector H of Capital Smart City, where we have two 5 Marla construction sites. God willing, construction work will soon begin on both plots.
Both plots are located on Street 6. The demarcation of the first plot has already been completed, and its soil test has also been finalized. The second plot is located nearby and will become our second construction project in this sector.
The soil quality in this area is good, and the soil-test reports are positive. These plots are suitable for constructing 5 Marla houses. We will also show a drone view so that you can understand the overall location and development of Sector H.
Several construction projects are beginning in this area. Sector H offers good options for buyers who want to build a 5 Marla house. Sector C, on the other hand, has more 10 Marla construction projects.
You may also contact us for maps, soil tests, construction services, and other property-related assistance in Capital Smart City.
Excavation and Land Leveling
In the previous video, we discussed the possession process for a 5 Marla plot in Capital Smart City. We have now entered the next stage of construction.
The excavation work has been completed according to the soil-test report. The required depth was excavated, and the correct ground level has now been achieved.
The next step is land compaction. After properly compacting the ground, we will proceed towards PCC, which involves laying a concrete layer over the prepared surface.
Checking the Construction Levels
Before starting PCC, the site levels must be checked carefully.
The level is measured to determine the required depth and thickness of the PCC layer. The levels of all four corners are compared with the proposed floor and porch levels.
A water-level pipe is used to check these measurements. The road level is also considered to determine how far below or above the construction level should be maintained.
This is an important stage because accurate leveling helps ensure that the foundation and floor remain properly aligned.
Anti-Termite Treatment
After completing the leveling and compaction, anti-termite treatment is applied as a preventive measure.
Although the ground was clear and there was no visible termite problem, the treatment was still carried out to prevent future damage.
For a 5 Marla plot, one complete bottle of good-quality anti-termite chemical is mixed into a full drum of water. The mixture is then spread thoroughly across the entire ground surface.
No area should be left untreated. The chemical must be distributed evenly across the complete construction area.
A good-quality bottle of anti-termite chemical costs approximately PKR 6,000 to PKR 7,000. A low-quality chemical should not be used because it may not provide effective protection.
The same anti-termite treatment should be applied again when the floor is constructed. This helps protect the house from termites entering through the ground or floor.
PCC Concrete Work
After completing the anti-termite treatment, the PCC work begins.
The concrete is mixed using a machine because the complete concrete layer must be prepared and spread within the required time. Machine mixing also helps maintain consistent concrete quality.
A thick concrete layer is laid over the solid ground. PCC should only be placed on properly compacted and solid soil. It should not be laid over loose or filled ground.
Once the complete PCC layer has been placed, water curing begins to strengthen the concrete.
Preparing for the Next Construction Stage
After completing the PCC work, the reinforcement steel arrives at the site.
The floor and porch levels are checked once again to confirm their position in relation to the ground and road levels.
With the excavation, compaction, anti-termite treatment, and PCC completed, the site is now prepared for the next stage of construction.
Foundation, Columns and Brickwork Progress
After the PCC was completed, the reinforcement steel was laid, and we started preparing the structural foundation of the house. The design included 13 reinforced-concrete columns, which were positioned according to the approved layout.
The steel strips were arranged across the foundation, while a tightly fixed string line marked the exact plot boundary. Following this boundary line accurately was essential to ensure that no part of the construction moved beyond or inside the approved plot dimensions.
Once the reinforcement was properly installed, the column bases were prepared and the columns were raised from their designated positions.
Underground Water Tank
At the same time, work began on the underground water tank. Its reinforcement mesh and shuttering were completed before the concrete was poured.
The concrete casting of the water tank came out very well. After casting, the tank was kept filled with water so that the concrete remained continuously moist during the curing period.
Concrete should never be allowed to dry too quickly. Water was applied at least twice daily to support proper setting, strength development and long-term durability.
Filling the Foundation Strips
The reinforced foundation strips and column bases were then filled with concrete. Cement, water and other required materials were arranged on-site, and the complete strip foundation was cast according to the structural layout.
The staircase area was also clearly marked within the foundation plan.
These reinforced strips form the main structural base of the house. When the steel reinforcement, column positions and concrete strips are correctly constructed, the building load is transferred safely through the structure and down to the PCC and solid ground.
This significantly improves the strength and integrity of the house.
Beginning the Brickwork
After the shuttering was removed, brickwork started from the rear end of the plot and gradually moved towards the front.
The columns were temporarily left open while the brick walls were constructed around them. Once the brickwork reached the required DPC level, the columns and DPC beam would be cast together.
This method helps connect the lower foundation structure, vertical columns and upper DPC level into one integrated structural system.
The brick walls mainly provide enclosure and support between the reinforced structural members, while the primary building load is transferred through the columns and foundation strips.
Curing the Brickwork
Water curing was carried out continuously as the brickwork progressed.
Applying water to newly constructed brick walls is extremely important because the mortar needs moisture to develop proper bonding and strength. Without sufficient curing, the mortar may not hold the bricks effectively.
The water tank concrete was also kept wet throughout the curing period.
DPC and Column Shuttering
As the brickwork reached the required height, shuttering material was brought to the site for the columns and the Damp-Proof Course, or DPC.
The next stage included:
Column shuttering
DPC shuttering and casting
Casting the water-tank roof slab
The DPC would connect with the columns and help bind the complete lower structure together.
Internal Waterproofing of the Water Tank
Before applying the internal chips finish, small indentations were made on the inside surface of the water tank. This process creates a rough and uneven surface so that the chips and waterproofing layer can bond firmly with the concrete.
Applying chips inside the underground water tank is an important long-term waterproofing measure. When completed properly, it helps prevent:
Water seepage
Leakage
Internal surface damage
Future maintenance problems
This work was being carried out in Sector H, Overseas East, Capital Smart City, where the construction of the house was steadily progressing from the foundation stage towards the complete ground-level structure.
DPC, Column Casting and Completion of the Foundation Structure
Most of the brickwork had now been completed, with only a small section remaining. At the same time, reinforcement bars were being cut and prepared for the roof slab of the underground water tank.
We then moved to the next major stage: the DPC shuttering. Shuttering was installed across the complete wall layout, and a continuous reinforced beam was formed above all the walls. This beam ran around the entire structure and connected with the columns.
A properly reinforced DPC beam significantly improves the load-bearing capacity of the house and allows the columns to carry structural loads more effectively. The ground at this site was already very solid, but we still followed the complete structural procedure without taking shortcuts.
The structure of a house should never be compromised. Finishing materials can be adjusted according to the available budget, but the strength of the foundation, columns and beams must remain a priority.
Water Tank and Sewage Tank Waterproofing
The slabs for the sewage tank were also prepared so they could be cast at the same time as the DPC and columns.
Internal chips treatment had already been completed inside both the sewage tank and the underground water tank. This work had to be completed while the tanks were still open because applying the treatment later would have been difficult.
The chips treatment helps reduce the risk of:
Water leakage
Seepage
Surface damage
Future waterproofing problems
Once the shuttering was completed, the site was ready for concrete filling.
Casting the DPC and Columns
A concrete-mixing machine was brought to the site so that the entire casting work could be completed in one continuous operation.
The DPC beam and all the columns were filled together. This connected the foundation strips, brick walls, columns and upper DPC beam into one complete structural system.
After casting, the shape of the house became clearly visible. The staircase location could also be identified, with reinforcement bars left exposed so they could later be connected to the staircase structure.
At this stage, the main foundation structure was complete.
Selecting the Right Bricks
The same type of good-quality brick was used throughout the construction from the beginning. Low-quality or overburnt bricks were not used, even though the price difference was relatively small.
Overburnt bricks generally have a lower water-absorption rate. When a brick absorbs too little water, the cement mortar may not bond with it properly.
Two important factors should be checked when selecting bricks:
Brick strength
The brick should have sufficient compressive strength and should meet the required quality standard.Water absorption and surface texture
The brick should not be substandard, but its surface should also not be excessively smooth. A slightly rough texture allows the mortar to grip the brick properly.
The most expensive brick is not always the most suitable. The brick must perform its basic structural function and provide proper bonding with the mortar.
Brick Wastage During Construction
The soil removed during excavation had initially been stored outside the plot. As the structure progressed, it also became clear that brickwork naturally produces a considerable amount of wastage.
When estimating the total number of bricks required for a house, a reasonable wastage allowance should always be included. Even with careful supervision, some bricks will be broken, cut or damaged during construction.
Testing the Sewage Tank
The rear gallery of the house was approximately five feet wide.
The sewage tank was tested after its internal chips treatment. It was filled with water and kept full during the testing and curing process.
After waterproofing treatment, underground tanks should not be left empty immediately. Keeping them filled with water helps test for leakage and supports proper curing.
Completion Timeline
The complete process—from excavation and foundation strips to brickwork, columns and DPC casting—took approximately two to two and a half months.
The work was completed during September, October and November. The weather remained suitable, which made the construction process easier to manage.
The foundation structure was now complete and ready for the next phase of house construction.
For construction services, soil testing, architectural drawings, maps or other property-related assistance, you may contact us.
Thank you very much. Allah Hafiz.